Saturday, February 28, 2009

The Daring Bakers make Chocolate Valentino Cake

Kristen's Food February 2009 058 #2

It's the end of another month and time once again for another Daring Baker's challenge.  Being the month of love it was fitting that chocolate be the star of this months challenge.

The February 2009 challenge is hosted by Wendy of WMPE's blog and Dharm of Dad ~ Baker & Chef.  We have chosen a Chocolate Valentino cake by Chef Wan; a Vanilla Ice Cream recipe from Dharm and a Vanilla Ice Cream recipe from Wendy as the challenge.

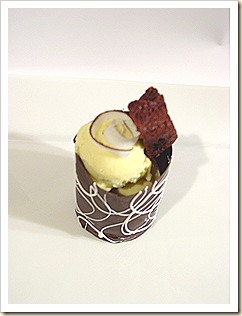
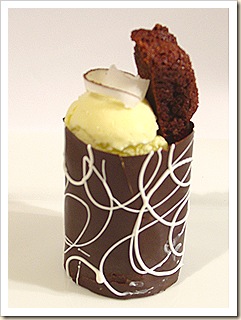
We have had so many sweets around here that I chose to halve the recipe for the valentino cake and bake them in my muffin tin.  For the ice cream I decided to go my own way and make up my own recipe.  I ended up with a deliciously creamy coconut ice cream, which is definitely for coconut lovers only.  Since the valentino recipe wasn't all that challenging I also decided to make these little chocolate cups which was a first for me.  I was so excited with how they came out.  They looked so fancy that I really didn't want to eat them.

  I put one of the small valentino cakes in the bottom of the chocolate cup and then topped it with the creamy coconut ice cream and then added another sliver of the cake as an accent and to let you know what was inside.   All in all a fun and delicious challenge.

My sentiment on the cake is that it was very similar to my rich chocolate brownies with a little silkier texture,  like a mix between an deeply chocolaty brownie and a silky smooth mouse.  A little of this cake definitely goes a long way.

Chocolate Valentino
Preparation Time:  20 minutes

Kristen's Food February 2009 060

16 ounces (1 pound) (454 grams) of semisweet chocolate, roughly chopped
½ cup (1 stick) plus 2 tablespoons (146 grams total) of unsalted butter
5 large eggs separated


1. Put chocolate and butter in a heatproof bowl and set over a pan of simmering water (the bottom of the bowl should not touch the water) and melt, stirring often.

2. While your chocolate butter mixture is cooling. Butter your pan and line with a parchment circle then butter the parchment.

3. Separate the egg yolks from the egg whites and put into two medium/large bowls.

4. Whip the egg whites in a medium/large grease free bowl until stiff peaks are formed (do not over-whip or the cake will be dry).

5. With the same beater beat the egg yolks together.

6. Add the egg yolks to the cooled chocolate.

7. Fold in 1/3 of the egg whites into the chocolate mixture and follow with remaining 2/3rds. Fold until no white remains without deflating the batter. {link of folding demonstration}

8. Pour batter into prepared pan, the batter should fill the pan 3/4 of the way full, and bake at 375F/190C

9. Bake for 25 minutes until an instant read thermometer reads 140F/60C.

Note – If you do not have an instant read thermometer, the top of the cake will look similar to a brownie and a cake tester will appear wet.

10. Cool cake on a rack for 10 minutes then unmold.

Coconut Ice Cream

1 can coconut milk

1/3 cup heavy cream

1 cup milk

5 egg yolks

3/4 cup sugar

1 tsp. coconut extract

1.  Heat the coconut milk, cream and milk until it just begins to from bubbles around the edges.

2.  Meanwhile, in the bowl of a mixer with the whisk attachment, beat the egg yolks and sugar together until light and pale and the mixture falls back on itself and forms ribbons.

3.  With the mixer on low,  slowly drizzle in a ladle full of the warm milk mixture.  Continue adding the milk mixture in ladle-fulls until you've add about 1/2 of the milk mixture.  Then pour the egg yolk  mixture back into the pan with the rest of the milk mixture.

4.  Put the mixture back over medium-low to medium heat and heat stirring constantly until the mixture begins to thicken and coats the back of a spoon.  Do not let it boil.

5.  Pour the thickened mixture through a sieve into a medium bowl.  Stir in the extract and let the mixture sit out to cool.  Once cooled, cover and refrigerate until well chilled preferably overnight.

6.  Freeze in ice cream maker according to the manufacturers instructions.
Saturday, February 14, 2009

A Little Hot Apple Love

Kristen's Food February 2009 036 

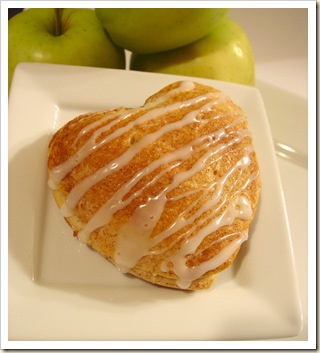
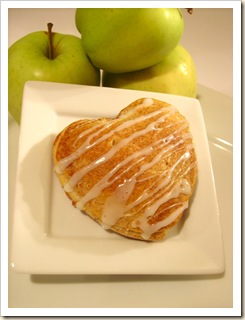
The other day my 5 year old came to me and asked me what we you do on Valentines day.  She wanted to know if we could go out an buy presents for each other like Christmas.  I explained that daddy and I would probably go out but besides that we wouldn't be doing much.  She then requested that we make heart shaped chocolate chip pancakes for breakfast and then tacos for dinner.  She then asked what we would have for dessert.  I knew she would love anything that we could make together and so these little heart shaped apple pastries came to be. 

These are so easy and the kiddos can help out.  All you need is an apple some cinnamon and sugar and some biscuit dough.

Heart Shaped Apple Pastries

Kristen's Food February 2009 033

1 medium golden delicious or granny smith apple, peeled and diced

2 1/2 Tbs. sugar

1 tsp cinnamon

1 can Grands biscuit dough (I used the flaky layers ones)

1 Tbs cream or milk

1 Tbs sugar

1/2 tsp. cinnamon

1.  Preheat the oven to 350° and grease a cookie sheet.  Mix together the apples, sugar and cinnamon.

2.  Separate the biscuits, roll out and cut with a heart shaped cutter.  Place a heaping spoonful of the apples on top the half of the hearts and cover with another heart shaped biscuit.  Crimp the edges with a fork.

3.  Mix together the remaining sugar and cinnamon.  Brush the top of the hearts with the cream or milk and sprinkle with the cinnamon and sugar mixture.  Poke a few slits in the top with a knife.

4.  bake for about 20 minutes or until the biscuits are browned and cooked all the way through.  Drizzle with the glaze**.

**To make the powdered sugar glaze, mix together 3/4 cup powdered sugar with 1-2 Tbs cream or milk.  Drizzle over hearts with a fork.**

Tuesday, February 10, 2009

Brownie Truffle Bites

Kristen's Food February 2009 029

This is a super easy recipe that would be great for your sweetie this Valentines day.  All you need is a pan of brownies, some white chocolate or almond bark and some red or pink candy melts.

I made a pan of my peanut butter brownies for this one but any brownie would work, even a mix.  Using a small scoop, make balls out of the brownies.  Chill or freeze until firm.  Melt some almond bark or white chocolate (almond bark will cover the chocolate better).  Dip the brownie balls into the chocolate and lay on a parchment lined tray to set.  Drizzle with some melted red or pink candy melts and viola.  East peasy lemon squeezy.

You could also roll the ball into powdered sugar, cocoa powder or coconut for an even easier little treat.  These are so easy that you've gotta try them.

Monday, February 2, 2009

Mini Chocolate Cream Pies


Kristen's Food January 2009 459

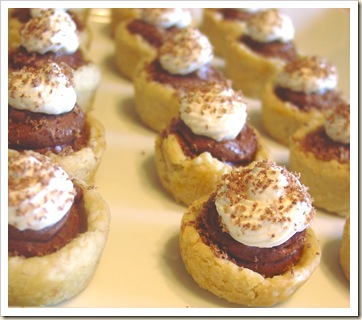
Today my kids and I wanted to make a desert for family night but were running low on supplies.  No chocolate chips for cookies, very little brown sugar or nuts.  What we did find on the other hand was some leftover pie dough in the freezer, a package of chocolate pudding (yes a mix), and some whipping cream.

We could have made  regular chocolate cream pie, but I love small treats.  I think that's because I don't feel so guilty eating them.  These were great because they were so easy that the kids could help out but they look so cute too.  After finishing these, my kids were covered with chocolate pudding and whipped cream, it was even in their hair.  It was pretty cute!

Mini Chocolate Cream Pie

Kristen's Food January 2009 457

3 cups flour

1/2 tsp. salt

3  Tbs. Sugar

1/2 cup cold butter, cut in to pieces

1/2 cup shortening

about 1/2 cup ice water

1 large pkg. (2.1 oz) Chocolate pudding

1 1/2 cups cold milk

1 cup cold whipping cream

Grated Chocolate for garnish (optional)

1.  In a large bowl, mix together the flour salt and sugar.  Cut in the butter an d shortening until the fat has irregular pieces about the size of peas.

2.  Slowly add a tablespoon of water at a time carefully mixing the water into the dough.  Add enough water so that the dough forms  a ball when pressed together.  Do not overmix.  Form the dough into two discs and wrap in plastic wrap and chill for at least one hour to let the gluten relax.

3.  Preheat the oven to 350°.  Grease a mini muffin tin.  Place a tablespoon of dough into each cup.  Using a mini tart shaper press the dough to form a mini pie shell.  Bake for about 15 minutes or until baked through.  Remove baked shells from pan and cool.

4.  Meanwhile, in a large mixing bowl, whip the cream until it forms stiff peaks.  Put the whipped cream into another bowl.  Empty the pudding mix and milk into the mixing bowl, whip together until thickened and well mixed.  Fold in 2/3 of the whipped cream in small batches into the pudding.  Be sure to fold and not mix as you don't want to deflate the whipped cream.

4.  Place the pudding mixture into a ziploc bag and snip the corner.  Pipe the pudding into the premade cooled shells.  Place the remaining whipped cream into another ziploc bag and pie the cream on top of the pies.  Garnish with some grated chocolate if desired.  Store the pies in the fridge to set.