Wednesday, October 29, 2008

Daring Bakers make Pizza

Kristen's Food October 2008 094

It's time for another Daring Bakers challenge.  This month, Rosa from Rosa's Yummy Yums chose pizza as our challenge.  In all honesty, I make pizza quite often and wasn't really challenged but it sure was fun and absolutely delicious.  I love this crust recipe which was from Peter Reinhart's The Bread Bakers Apprentice.  It makes a chewy crust that is similar to a ciabatta bread and works so well with a wide variety of ingredients.

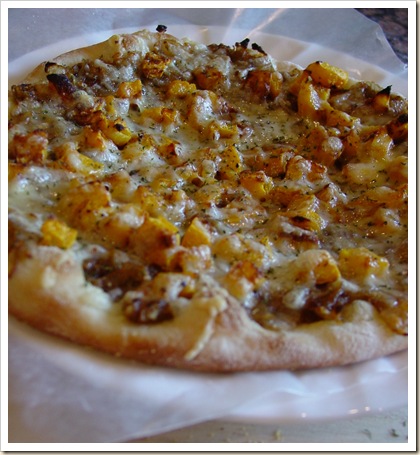
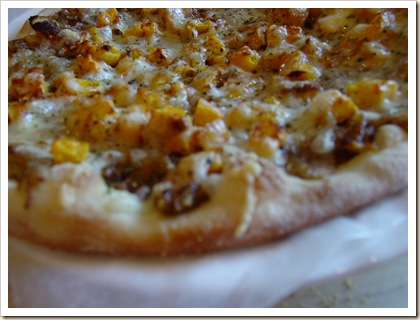
  I was able to make several pizzas with the one batch of dough.  The first was my tasty fall pizza which was inspired by my trip to a local farm and orchard.  Just a few miles down the road is a local orchard that has this cute little store in an old barn.  They sell all of their own produce which is always so delicious.   I was able to pick up some candy onions and a few pumpkins and squashes.  Now my pizza began to take shape.  I knew that the sweet onions would be great caramelized and the sweet and nutty butternut squash needed to be roasted.  I complimented the two ingredients with a creamy, salty fontina and viola my pizza was born. I actually ate it for breakfast and lunch.Kristen's Food October 2008 093
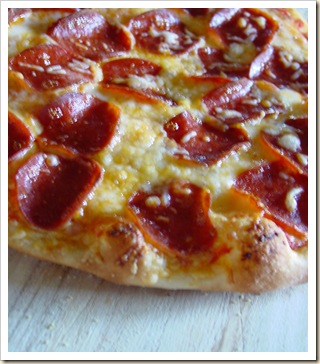
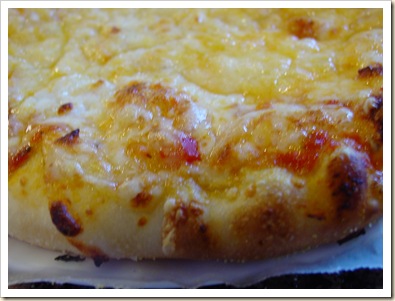
I then needed to make pizzas that the rest of my family would eat so I made a fresh batch of marinara and took the traditional route and made a pepperoni and a cheese pizza.  The family gobbled them all up and gave them both a big thumbs up.

Kristen's Food October 2008 099 

I still had two more balls of dough left the next day so I brushed the shaped dough with olive oil and some sea salt abd baked them.  Once they cooled off I spread them with a mixture of cream cheese and sour cream mixed with some seasonings and then topped them with fresh broccoli, cucumbers, red peppers, tomatoes and grated carrots.  It was light and tasty and worked well with the chewy crust.

Kristen's Food October 2008 116

Overall, this was a very tasty and fun recipe and am glad that I was able to participate in this challenge.  If you're looking for a great pizza dough recipe, you must try this one, it is delicious!   And, don't forget to check out all of the other Daring Baker's tasty creations.


BASIC PIZZA DOUGH
Original recipe taken from “The Bread Baker’s Apprentice” by Peter Reinhart.
Makes 6 pizza crusts (about 9-12 inches/23-30 cm in diameter).

Ingredients:
4 1/2 Cups  Unbleached high-gluten  bread flour or all purpose flour, chilled
1 3/4 Tsp Salt
1 Tsp Instant yeast
1/4 Cup  Olive oil or vegetable oil
1 3/4 Cups  Water, ice cold (40° F/4.5° C)
1 Tbs. sugar
Semolina/durum flour or cornmeal for dusting

DAY ONE
Method:
1. Mix together the flour, salt and instant yeast in a big bowl (or in the bowl of your stand mixer).

2. Add the oil, sugar and cold water and mix well (with the help of a large wooden spoon or with the paddle attachment, on low speed) in order to form a sticky ball of dough. On a clean surface, knead for about 5-7 minutes, until the dough is smooth and the ingredients are homogeneously distributed. If it is too wet, add a little flour (not too much, though) and if it is too dry add 1 or 2 teaspoons extra water.
NOTE: If you are using an electric mixer, switch to the dough hook and mix on medium speed for the same amount of time.The dough should clear the sides of the bowl but stick to the bottom of the bowl. If the dough is too wet, sprinkle in a little more flour, so that it clears the sides. If, on the contrary, it clears the bottom of the bowl, dribble in a teaspoon or two of cold water.
The finished dough should be springy, elastic, and sticky, not just tacky, and register 50°-55° F/10°-13° C.

3. Flour a work surface or counter.  Line a jelly pan with baking paper/parchment. Lightly oil the paper.

4. With the help of a metal or plastic dough scraper, cut the dough into 6 equal pieces (or larger if you want to make larger pizzas).
NOTE: To avoid the dough from sticking to the scraper, dip the scraper into water between cuts.

5. Sprinkle some flour over the dough. Make sure your hands are dry and then flour them.  Gently round each piece into a ball.
NOTE: If the dough sticks to your hands, then dip your hands into the flour again.

6. Transfer the dough balls to the lined jelly pan and mist them generously with spray oil. Slip the pan into plastic bag or enclose in plastic food wrap.

7. Put the pan into the refrigerator and let the dough rest overnight or for up to thee days.
NOTE: You can store the dough balls in a zippered freezer bag if you want to save some of the dough for any future baking. In that case, pour some oil(a few tablespoons only) in a medium bowl and dip each dough ball into the oil, so that it is completely covered in oil. Then put each ball into a separate bag. Store the bags in the freezer for no longer than 3 months. The day before you plan to make pizza, remember to transfer the dough balls from the freezer to the refrigerator.

DAY TWO
8. On the day you plan to eat pizza, exactly 2 hours before you make it, remove the desired number of dough balls from the refrigerator. Dust the counter with flour and spray lightly with oil. Place the dough balls on a floured surface and sprinkle them with flour. Dust your hands with flour and delicately press the dough into disks about 1/2 inch/1.3 cm thick and 5 inches/12.7 cm in diameter. Sprinkle with flour and mist with oil. Loosely cover the dough rounds with plastic wrap and then allow to rest for 2 hours.
Or

9. At least 45 minutes before making the pizza, place a baking stone on the lower third of the oven.  Preheat the oven as hot as possible (500° F/260° C).
NOTE: If you do not have a baking stone, then use the back of a jelly pan. Do not preheat the pan.

10. Generously sprinkle the back of a jelly pan with semolina/durum flour or cornmeal. Flour your hands (palms, backs and knuckles). Take 1 piece of dough by lifting it with a pastry scraper. Lay the dough across your fists in a very delicate way and carefully stretch it by bouncing it in a circular motion on your hands, and by giving it a little stretch with each bounce. Once the dough has expanded outward, move to a full toss.

NOTE: Make only one pizza at a time.
During the tossing process, if the dough tends to stick to your hands, lay it down on the floured counter and reflour your hands, then continue the tossing and shaping.
In case you would be having trouble tossing the dough or if the dough never wants to expand and always springs back, let it rest for approximately 5-20 minutes in order for the gluten to relax fully,then try again.
You can also resort to using a rolling pin, although it isn’t as effective as the toss method.

11. When the dough has the shape you want (about 9-12 inches/23-30 cm in diameter - for a 6 ounces/180g piece of dough), place it on the back of the jelly pan, making sure there is enough semolina/durum flour or cornmeal to allow it to slide and not stick to the pan.

12. Lightly top it with sweet or savory toppings of your choice.

13. Slide the garnished pizza onto the stone in the oven or bake directly on the jelly pan. Close the door and bake for abour 5-8 minutes.

If the top gets done before the bottom, you will need to move the stone or jelly pane to a lower shelf before the next round. On the contrary, if the bottom crisps before the cheese caramelizes, then you will need to raise the stone or jelly.

14. Take the pizza out of the oven and transfer it to a cutting board or your plate. In order to allow the cheese to set a little, wait 3-5 minutes before slicing or serving.
Thursday, October 16, 2008

Mini Pumpkin Cheesecakes with Chocolate Ganache

Kristen's Food October 2008 078

I am going to start by saying that I love cheesecake. It is probably my one major vice out of all desserts. Most others I can put down and not eat after a few bites, but cheesecake is another story. In fact, when I made the cheesecake for a Daring Baker's challenge a few months ago I ate the whole thing , by myself. Now we aren't talking about a small cheesecake, we are talking about a 13x9 pan full of cheesecake. I left it in the fridge with a fork and would just come back throughout the day for a few little bites. Before I knew it, the cheesecake was gone.

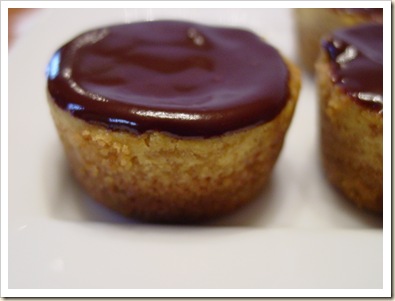
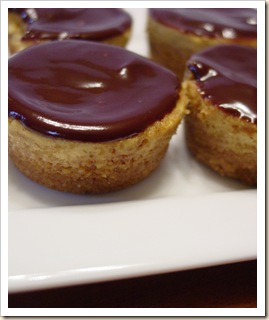
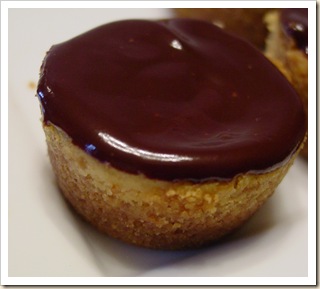
I have been wanting to make cheesecake for a few weeks now. And was planning on making a full pan of cheesecake, but over the weeks, I used the cream cheese for other things. So, when I decided to make the these yesterday I only had one package of cream cheese left. I decided that the cheesecake would have to be mini. Now, this could be just as dangerous, the cheesecakes are perfectly bite size and just waiting there in the fridge for me to eat them. I had some pumpkin left over from those cookies and also some chocolate ganache from a cake and so I thought that I'd use those up too.

These little cheesecakes with pumpkin and chocolate turned out so delicious. I really need to get them out of the house before I eat them all! I tell you what, I could not for the life of me get my pumpkin hating husband to try these. So, more for me, he doesn't know what he is missing out on.

Mini Pumpkin Cheesecakes with Chocolate GanacheKristen's Food October 2008 069

6 long sheets of graham crackers

1 Tbs. sugar

a pinch of salt

2 Tbs. butter, melted

1 pkg. (8oz.) cream cheese, softened

1/3 cup sugar

1 egg, room temperature

1/2 tsp vanilla

a pinch of salt

1 1/4 tsp pumpkin pie spice

1/3 canned pumpkin

1. Preheat the oven to 350°. Spray a mini muffin pan with cooking spray and set aside.

2. Add the graham crackers, sugar and salt to food processor and process until graham crackers are fine crumbs. With the machine running, add the melted butter and mix to combine.

3. Put about 1 Tbs. of the crumb mixture into each mini muffin cup (it will make 16 mini cheesecakes). Press the crumbs into each cup. Bake the crusts for 8 minutes. Remove from oven and let cool on cooling rack while you mix the filling. Reduce the oven temperature to 325°. Bring a pot of water to a boil.

4. Rinse out the food processor. In food processor cream the cream cheese until smooth, scraping down the sides as needed. Add the sugar and cream for another minute or two. Add the egg and mix for another minute or two. Scrape down the sides as needed. Add the vanilla, salt, pumpkin pie spice and pumpkin and mix for another minute to combine. Scrape down the side and the bottom of the bowl and give it one last quick mix.

5. Pour the mixture into the crusts, filling to the top. Place the muffin pan onto a baking sheet. Place in the oven. Carefully pour the water into the baking pan being sure not to let it get into the muffin tin. you want the water to come about halfway up the muffin pan. Bake the cheesecakes at 325° for about 24 minutes. Carefully remove the muffin pan from the baking sheet and let cool on a cooling rack for 20 minutes. Then refrigerate them in the pan for another 30 minutes.

6. Carefully run a small thin knife around the edges of each cheesecake and pop them out the pan. Pour about a teaspoon of ganache (recipe follows) onto each cheesecake and spread if desired. Return to the fridge to let the ganache harden.

Chocolate Ganache

This recipe will make a lot more than you need (about 1 cup) but you can cut the recipe in half or make the entire batch and freeze the leftovers for a cake, truffle or a tart.Kristen's Food October 2008 075

6 oz. (good) semisweet or bittersweet chocolate, like Lindt
6 oz. (¾ cup heavy cream
1 Tbsp. light corn syrup
¾ tsp. vanilla

1. Break the chocolate into 1-inch pieces and place in the basket of a food processor and pulse until finely chopped. Transfer into a medium sized bowl and set aside.

2. Heat the cream and corn syrup in a saucepan, on low, until it reached a gentle boil. Once boiling, immediately and carefully pour over the chocolate. Leave it alone for one minute, then slowly stir and mix the chocolate and cream together until the chocolate is melted and incorporated into the cream. Carefully blend in vanilla. The glaze will thicken, but should still be pourable. If it doesn’t thicken, refrigerate for about 5 minutes, but make sure it doesn’t get too cold!

Thursday, October 9, 2008

Pumpkin and Spice Sugar Cookies

Kristen's Food October 2008 030

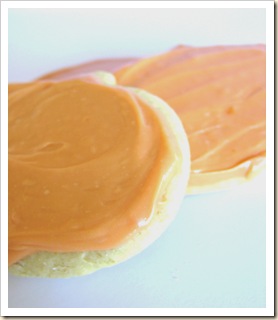
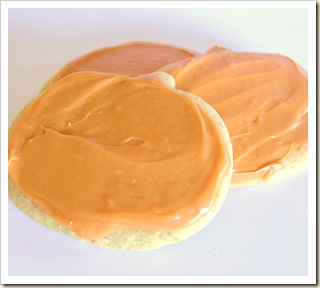
The weather is changing and the cool air has got me thinking pumpkin and spice. I really don't like the cold weather but I do love the warm spices and flavors that come with the season. I love all of the holidays and family get together's. I came from a small family so I love that my husbands family is a bit bigger and has huge family gatherings. I am already thinking of the fall foods like buttered butternut squash and pumpkin spiced cookies.

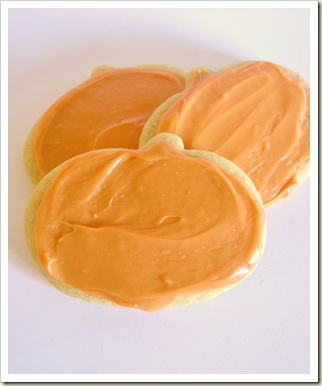
I was at the store yesterday buying a few ingredients to make cookies when I passed the pumpkin. I couldn't pass it up and knew that I needed to incorporate it somehow into my cookies. I didn't want to make the traditional pumpkin cookies but thought instead that it would be fun to try to incorporate the pumpkin into my buttermilk sugar cookie recipe. It turned out perfectly and in my book, is a total winner. I will be making these cookies again. I was even able to get my picky pumpkin hating husband to try one and actually eat the whole thing. It was pretty funny though, when he got home from work, I kept on asking him to try a cookie and he kept on saying, "I will in a minute" , acting like he was too busy at the moment. After 10 minutes of being too "busy" I stopped him and said, "Knock it off, you just don't want to try them because they have pumpkin in them, just try them!" He reluctantly took a little bite of one, and then another and he actually ate the whole cookie.

Kristen's Food October 2008 029 #2

The pumpkin is very subtle and I didn't put too much of the pumpkin pie spice in them so that it was only a little hint of the fall flavors. If you're a big spice fan then you could definitely add more of the pumpkin pie spice. I topped the cookies with a tangy cream cheese frosting, if you wanted more of the spice, you could even add a dash of the pumpkin pie spice into the frosting.

Pumpkin and Spice Cookies

Kristen's Food October 2008 028

3/4 cup (1 1/2 sticks) butter, softened

2 cups sugar

1 tsp. vanilla

2 eggs

6 cups flour

1 tsp pumpkin pie spice

1 tsp. baking soda

2 tsp. baking powder

1 tsp. salt

1/2 cup pureed pumpkin

1/2 cup buttermilk

1. In the bowl of a mixer fitted with the paddle attachment, cream together the butter and the sugar until light and fluffy, about 5 minutes.

2. Meanwhile, in a large bowl, mix together the flour, pumpkin pie spice, baking soda, baking powder and salt. Whisk until combined. In another small bowl, whisk together the buttermilk and pumpkin. Set both aside.

3. In the mixer, add the eggs, one at a time to the butter and sugar mixture, mixing well after each egg. Add the vanilla and mix until combined.

4. Add 1/3 of the flour mixture, mixing until almost combined. Now add 1/2 of the buttermilk mixture and then another third of the flour. Repeat with the last of the buttermilk and then the flour, mixing until just combined.

5. Divide the dough into thirds, shape into disks and wrap in plastic wrap. Refrigerate for at least an hour to firm the dough up.

6. Preheat the oven to 350°, roll out dough on a well floured counter and cut into desired shape. Bake on a cookie sheet for 8-10 minutes. Let cool for a minute on the cookie sheet and then remove cookies to a cooling rack. Once cooled frost as desired.

Wednesday, October 8, 2008

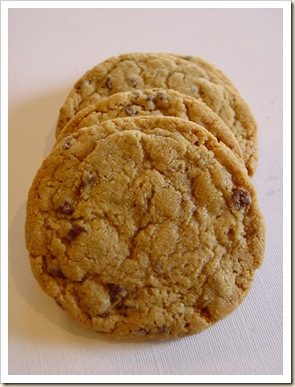
Chewy Chocolate Chip Cookies

Kristen's Food October 2008 016

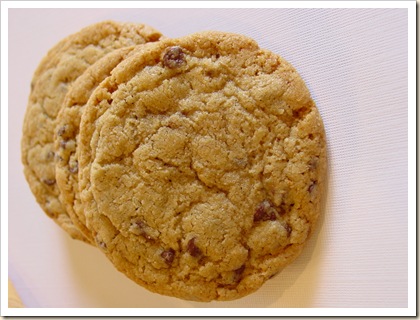
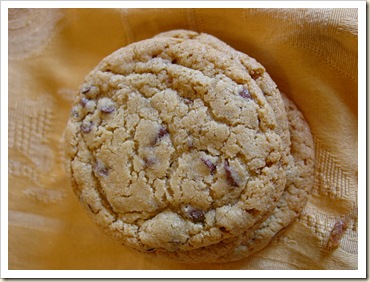
My husband has been begging me forever to just make some chocolate chip cookies. So, when he was gone on Saturday night, I rounded up the kids and we threw together a batch of these chewy chocolaty cookies as a surprise for when he got home. I love these because they are chewy due to the ground up oatmeal and the corn syrup (yes corn syrup, but you only use a little). I love to use mini chocolate chips and if my husband isn't looking a handful of finely chopped walnuts.

Kristen's Food October 2008 003

I usually will make a batch of these and only bake up a dozen. the other 3 dozen I roll into balls, place them on a baking sheet and freeze. Once frozen, I move them to a plastic bag. I then have little cookie balls that I can pull out and bake whenever someone drops by or when I need a quick treat to bring somewhere. They can be baked frozen and only take a minute or two longer.

These cookies are pretty flat but they stay soft and chewy. Be sure to remove them from the oven once the edges are just beginning to turn golden brown and when the tops have little cracks on them. They will look a little doughy but will firm up once they cool off.

Chewy Chocolate Chip Cookies

Kristen's Food October 2008 023

1 cup (2 sticks) butter, softened

1 cup granulated sugar

1 cup packed brown sugar

1 1/2 Tbs. corn syrup (I used dark but light would also work)

2 eggs

1 tsp. vanilla

3 cups of oatmeal, ground into a flour

1 cup flour

1/2 tsp salt

1 tsp. baking powder

1 tsp. baking soda

12 oz. chocolate chips, (I like mini)

1 cup walnuts, chopped (optional)

1. Preheat oven to 350°. In the bowl of a mixer with the paddle attachment, cream together the butter and sugars until light and fluffy, about 5 min.

2. In a separate bowl, combine the oatmeal, flour, salt, baking soda, and baking powder. Mix with a whisk to combine all of the ingredients.

3. In the mixer bowl with the butter, add the vanilla and corn syrup and mix to combine. With the mixer still running, add the eggs, one at a time, mixing until well combined.

4. With the mixer on low, slowly add the flour mixture a little at a time, mixing only until combined, do not over mix. Add the chocolate chips and nuts, if using ,and mix just until they are evenly mixed into the dough.

5. Using a scoop, scoop cookie dough into balls and place on baking sheet leaving 2 inches of space between each cookie. Bake at 350° for 9-11 minutes, or until the edges start to turn golden brown and the tops have little crack in them. the cookies will look a little doughy but they will set up as they cool off. Let them cool for a few minutes on the cookie sheet before removing them to a cooling rack.

Thursday, October 2, 2008

Hot Buttery Pretzels

Kristen's Food September 2008 057

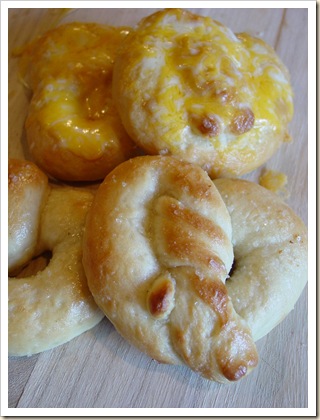
This last weekend I had a chance to go out with some friends and we stopped by the mall for a little shopping. I happened to be absolutely starving and of course we passed one of those yummy pretzel shops that adorn malls everywhere. I passed it and really wanted to grab a pretzel but since we were going out to dinner afterwards I decided that I could wait. When I really want something and don't get it than it enters my thoughts until I finally give in. Thus my need to make some of those hot buttery mall pretzels.

I recently got the King Arthur Flour: Bakers Companion Cookbook and have been meaning to make their recipe for the mall-type pretzels. I decided today that my desire for those yummy pretzels could wait no longer and I am so glad that I made them. In fact the batch is already gone. My son kept sneaking them when I wasn't looking. I finally had to hide the last one so that I could eat it later when he was taking a nap.

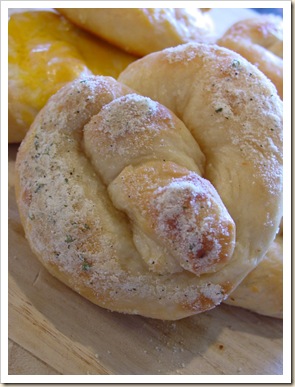
If you love those yummy mall pretzels then you should try this recipe. It doesn't make the chewy, bagel-type pretzels but the soft, buttery doughy-type. A definite keeper in my book. For toppings I used sea salt for a few, cheddar cheese for a couple more and my favorite buttered and then lightly dusted with ranch powder (the kind you use to make ranch dip or dressing). Of course you could go for the sweet versions like cinnamon-sugar but I personally prefer all of the salty flavors.

Kristen's Food September 2008 061

Buttery Mall-Type Pretzels

2 1/2 cups unbleached flour

1/2 tsp salt

1 tsp sugar

2 1/4 teaspoons instant yeast

7/8 to 1 cup water

Topping

1/2 cup warm water

1 tsp sugar

course salt

3 Tbs. salted butter, melted

1. Place all dough ingredients in bowl of mixer and mix until combined. Up the speed and knead for 5 minutes, until the dough is soft and smooth. Dust the dough lightly with flour and place in a plastic bag. Close bag and let rest for 30 minutes.

2. Preheat the oven to 500°. Spray 2 baking pans lightly with cooking spray. Transfer the dough to a lightly greased work surface and divide into 8 equal pieces. Let the pieces rest for 5 minutes uncovered.

3. Roll each piece of dough into a long thin rope, about 28 inches long. Twist each rope into a pretzel shape. Dip the pretzels into the warm water that has been mixed with 1 tsp. sugar and place them on the baking sheet. Sprinkle them lightly with salt if desired and let them rest for 10 minutes uncovered.

4. Bake pretzels for 8-9 minutes rotating the pans half way through. Remove the pretzels from the oven and brush them generously with the butter. Use all of the butter, it will absorb into the pretzels so keep on brushing them until it's gone. Top them with desired topping.