Sunday, April 27, 2008

Cheesecake pops with the Daring Bakers

food April 2008 081 #2

Here it is, the end of the month already and time for another installment of the Daring Bakers. This months challenge was hosted by Deborah from Taste and Tell and Elle from Feeding My Enthusiasms. I have to say that I was so excited when I found out that the challenge was Cheesecake pops. Cheesecake is one of my all time favorite desserts and I knew that I would have no problem making and eating this delectable treat.

pink_db

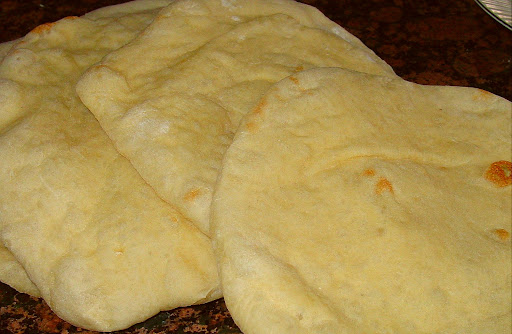
The recipe was pretty straight forward. Bake a crustless cheesecake in a water bath, chill and scoop into balls. Freeze the balls with a lollipop stick in them and then dunk in tempered chocolate and coat with various toppings. The only thing that I found wrong with the recipe was the baking time. The recipe called to bake the cheesecake for 35-45 minutes and mine took about 60. That is a pretty huge discrepancy, but it seems that many of the Daring Bakers had the same problem. It makes me wonder if the recipe was written wrong in the cookbook as I have never baked so large a cheesecake in less than 50-60 minutes. Luckily having baked several cheesecakes before, I knew not to take it out so early.

The recipe turned out a silky smooth cheesecake that was extremely delicious. I will admit that I only made half of the recipe into the pops (which still gave me 30-40 pops). The rest I ate bite by bite throughout the day gaining me 5 extra pounds that week, but oh was it worth it! (I just can't resist cheesecake!!!)

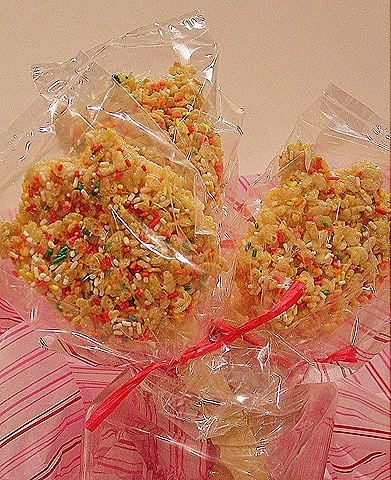
I treated the cheesecake pops like caramel apples. I dressed part of the batch in dark chocolate and sprinkles, another part of the batch with dark chocolate, walnuts and chewy caramel. The last part of the batch I dipped directly into the hot chewy caramel and then into walnuts and then drizzled them with dark chocolate. I did have a bit of trouble dipping them into the caramel as it needed to be at a higher temperature to be thin enough to dip. This caused the cheesecake to start to melt a little and 2 or three of the bites fell off of the sticks. No matter they still tasted delicious with their chewy outer shell and their velvety centers. All in all it was a great challenge and one that I am likely to repeat.

food April 2008 067#2

Cheesecake Pops

food April 2008 064 #3

adapted from Sticky, Chewy, Messy, Gooey by Jill O’Connor
Makes 30 – 40 Pops (or more if you make them small like I did)

5 8-oz. packages cream cheese at room temperature
2 cups sugar
¼ cup all-purpose flour
¼ teaspoon salt
5 large eggs (I used 3 eggs when I baked half the recipe without a problem)
2 egg yolks
1 vanilla bean, seeded
¼ cup heavy cream
Thirty to forty 8-inch lollipop sticks
1 pound chocolate, chopped or in chips
2 tablespoons vegetable shortening
(Note: White chocolate is harder to use this way, but not impossible)
Assorted decorations such as chopped nuts, colored jimmies, crushed peppermints, mini chocolate chips, sanding sugars, dragees) I also used cut chocolate transfer sheets.
Position oven rack in the middle of the oven and preheat to 325 degrees F. Set some water to boil.
In a large bowl, beat together the cream cheese, sugar, flour, and salt until smooth. If using a mixer, mix on low speed. Add the whole eggs and the egg yolks, one at a time, beating well (but still at low speed) after each addition. Beat in the vanilla and cream.
Grease a 10-inch cake pan (not a springform pan), and pour the batter into the cake pan. Place the pan in a larger roasting pan. Fill the roasting pan with the boiling water until it reaches halfway up the sides of the cake pan. Bake until the cheesecake is firm and slightly golden on top, 35 to 45 minutes. (Mine took 55-60 minutes)
Remove the cheesecake from the water bath and cool to room temperature. Cover the cheesecake with plastic wrap and refrigerate until very cold, at least 3 hours or up to overnight.
When the cheesecake is cold and very firm, scoop the cheesecake and place on a parchment paper-lined baking sheet. Carefully insert a lollipop stick into each cheesecake ball. Freeze the cheesecake pops, uncovered, until very hard, at least 1 to 2 hours.
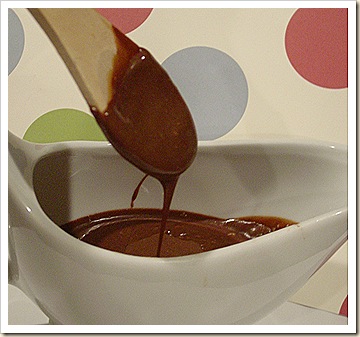
When the cheesecake pops are frozen and ready for dipping, prepare the chocolate. In the top of a double boiler, set over simmering water, or in a heatproof bowl set over a pot of simmering water, heat half the chocolate and half the shortening, stirring often, until chocolate is melted and chocolate and shortening are combined. Stir until completely smooth. Do not heat the chocolate too much or your chocolate will lose it’s shine after it has dried. Save the rest of the chocolate and shortening for later dipping, or use another type of chocolate for variety.
Alternately, you can microwave the same amount of chocolate coating pieces on high at 30 second intervals, stirring until smooth.
Quickly dip a frozen cheesecake pop in the melted chocolate, swirling quickly to coat it completely. Shake off any excess into the melted chocolate. If you like, you can now roll the pops quickly in optional decorations. You can also drizzle them with a contrasting color of melted chocolate (dark chocolate drizzled over milk chocolate or white chocolate over dark chocolate, etc.) Place the pop on a clean parchment paper lined baking sheet to set. Repeat with remaining pops, melting more chocolate and shortening (or confectionary chocolate pieces) as needed.
Refrigerate the pops for up to 24 hours, until ready to serve.

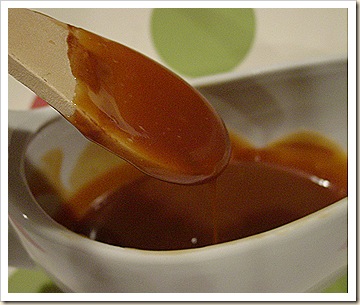
The Best Ever Caramel

(adapted from a Bon Appetit recipe for caramel apples)

1 1-pound box dark brown sugar
1 cup (2 sticks) unsalted butter, room temperature
1 14-ounce can sweetened condensed milk
1 cup dark corn syrup
1/2 teaspoons vanilla extract
1/4 teaspoon salt
Whipping cream (if necessary)

Combine all ingredients except for the whipping cream in heavy 2 1/2-quart saucepan (about 3 inches deep). Stir with wooden spatula or spoon over medium-low heat until sugar dissolves (no crystals are felt when caramel is rubbed between fingers), occasionally brushing down sides of pan with wet pastry brush, about 15 minutes.

Attach clip-on candy thermometer to side of pan. Increase heat to medium-high; cook caramel at rolling boil until thermometer registers 236°F, stirring constantly but slowly with clean wooden spatula and occasionally brushing down sides of pan with wet pastry brush, about 12 minutes. Pour caramel into metal bowl (do not scrape pan). Submerge thermometer bulb in caramel; cool, without stirring, to 200°F, about 20 minutes.

If caramel becomes too thick to dip into, add 1 to 2 tablespoons whipping cream and briefly whisk caramel in bowl over low heat to thin.

del.icio.us Tags: ,

Friday, April 25, 2008

Biscuits, mmm, need I say more?

Kristen's Food April 2008 098

I love to read and inevitably something happens every time I read a book. I have found that when a book starts describing the food I then become obsessed with making said food. I remember reading the Harry Potter books where the feasts were always described in great detail, and desiring those delicious foods. I have read books about the pioneers and craved good home-style cooking. That is where I am at right now. I have had a hankering for a good biscuit for quite sometime now and so today was the day that my biscuit craving was finally quelled. I searched for several recipes and then I remembered a conversation that I had with a friend several years ago. She told me that her grandma made the best biscuits but refused to divulge the secret recipe. My friend had been trying to piece together the recipe over the years from the little information that her grandma would give her. One thing that she mentioned was that it wasn't a typical biscuit with butter cut into flour. All that she really knew was that it contained flour and heavy cream. Recently I found a recipe for cream biscuits that sounded like what my friend had described. I changed it up a bit and let me say that the results were delicious. My only concern was that I ate 3 or 4 of them right when they came out of the oven! This could be a dangerous habit of mine, especially for my waistline.

If you're looking for a super easy and delicious biscuit, this is it. There is no cutting in of butter and the mix comes together in about 5 minutes. You can have hot, fresh biscuits in about 20 minutes, yummm!

Kristen's Food April 2008 089

Cream Biscuits

2 cups flour

2 tsp. sugar

2 tsp. baking powder

1/2 tsp. salt

1 cup heavy cream

1/2 cup buttermilk

melted butter for biscuit tops

1. Adjust oven rack to upper middle position and preheat oven to 450 degrees. Spray a cookie sheet nonstick cooking spray and set aside.

2. In a bowl, whisk together the flour, sugar, baking powder and salt. Make a well in the middle and add the cream and buttermilk. Stirring with a scraper or wooden spoon until the dough comes together. Dump the dough onto a floured counter and knead for 30 seconds until the dough comes together an is no longer sticky on the outside.

3. Pat the dough out into a round that is about 3/4 inch thick. Cut into wedges or cut into rounds using a biscuit cutter. Brush tops of biscuits with melted butter and bake for about 15 minutes or until lightly browned and cooked through. Remove from oven and again brush tops with melted butter.


del.icio.us Tags:
<

Tuesday, April 22, 2008

Honey ginger and lemon almonds

food April 2008 082 #2

Whenever I go to games or events at the stadium the smell of roasted sugared almonds fills the entire building. I am almost always tempted to shell out the $3-$4 for the small little bags of candied nuts. Not anymore. Today, I made the best candied almonds. They were so delicious that my husband and I, (ok, it was mostly me), finished off the whole batch. My husband, who is not much of an almond fan couldn't put them down.

Don't be put off by the ginger and lemon, you can leave them out if you want but I found that they gave the nuts that little hint of flavor that you couldn't quite put your finger on. You can also play around with the flavors substituting cinnamon or a little cayenne pepper. These are so delicious, they will be a staple snack and party treat for years to come.

Honey ginger and lemon almonds

food April 2008 088 #2

2 cups whole almonds

1/4 cup honey

2 Tbs. butter

1/4 tsp. fresh grated ginger

1/2 tsp grated lemon zest

1/4 tsp. salt

1/2 tsp. vanilla

1/2 cup turbinado sugar (raw sugar)

1. Preheat the oven to 350 degrees. Spread the almonds onto an ungreased cookie sheet and bake for 12-15 minutes tossing occasionally until toasted and fragrant.

2. In a medium saucepan, combine the honey, butter ginger, lemon zest, salt and vanilla. Bring to a boil over medium heat. Reduce heat and simmer for 2 minutes. Add the almonds and simmer for 2 more minutes. Spread almonds onto a cookies sheet that has been lines with foil and sprayed with nonstick cooking spray. Separate any nuts that are stuck together. Cool slightly (do not cool too long or the sugar won't stick).

3. Place the turbinado sugar into a large bowl and toss with the warm almonds making sure that all of the nuts are evenly coated.

del.icio.us Tags:

Tuesday, April 15, 2008

Pita and "Thomas"

Kristen's Food April 2008 026

The other day my daughter came to me asking for a snack, when I asked her what she wanted, she replied, "pita chips and "Thomas". I couldn't help but smile. I knew that she meant hummus, but I'd much rather call it "Thomas" and laugh. I love the way that kids think and all of the funny things they say. For example, we have a karaoke machine which the same daughter thought was called a teriyoki machine (like teriyaki sauce), hilarious! Anyway, back to the "Thomas". I am very lucky that a few of my "weird" vegetarian quirks have rubbed off onto my three kids, especially with my husband around! One of the things that all of my kids love is hummus. They will eat any flavor of it and love to dip pita, crackers and all assortments of veggies. I don't mind buying it, but it is so easy to make. I decided with the hummus that I would make some fresh pita bread too. If you have never had fresh pita bread, you must try it, it is soft and slightly chewy and just down right delicious. It is also very versatile, and can be filled with anything from hummus to salad or just microwave with some cheese inside. It is also really easy to make, it's just a basic bread dough that is rolled out and cooked on a pizza stone in a very hot oven.

Hummus

1 can (15 oz.) garbanzo beans, drained and rinsed

1 TBS tahini (sesame seed paste, recipe to follow)

1 clove of garlic, chopped

1/2 tsp salt

1/4 tsp pepper

zest of 1 lemon

juice of half of lemon

olive oil

Add all ingredients except for the olive oil into a food processor, blend for a minute. With the food processor running, add the olive oil until the humus is to desired consistency. (you can replace some of the olive oil with warm water if you want to make it lower in fat).

Tahini

1 cup of sesame seeds

1/4 cup peanut or canola oil

1tsp salt

In a dry skillet, add the sesame seeds and toast lightly over medium heat stirring frequently to ensure that the seeds don't burn Toast them only lightly, you do not want them to darken too much. Let the seeds cool slightly. Add the toasted seeds and the salt to a blender. With the blender running stream in the oil until the mixture is the consistency of peanut butter. Tahini can be stored in the fridge for 2 weeks.

Pita bread (from Tyler Florence)

Kristen's Food April 2008 027 Kristen's Food April 2008 024

1 package active dry yeast
1 teaspoon sugar
11/2 cups warm water
1 teaspoon salt
31/2 cups bread flour, plus more for dusting
1 teaspoon olive oil

In the bowl of a heavy-duty electric mixer fitted with a dough hook, combine the yeast, sugar, and warm water; stir to blend. Let the yeast stand until foamy, about 5 to 10 minutes.

Stir in the salt. Add the flour, a little at a time, mixing at the lowest speed until all the flour has been incorporated and the dough gathers into a ball; this should take about 4 minutes.

Turn the dough onto a lightly floured surface and knead until it's smooth and elastic. Transfer the dough to a lightly oiled bowl, turn it over to coat, and cover with plastic wrap. Allow to rise until double in size, about 1 1/2 hours.

Place a large pizza stone on the lower oven rack, preheat the oven (and stone) to 500 degrees F.

Punch the dough down, divide it into 8 pieces, and gather each piece into a ball; keeping all of them lightly floured and covered while you work. Allow the balls of dough to rest, covered, for 15 minutes so they will be easier to roll out.

Using a rolling pin, roll each dough ball into a circle that is about 8-inches in diameter and 1/4-inch thick. Make sure the circle is totally smooth, with no creases or seams in the dough, which can prevent the pitas from puffing up properly. Cover the disks as you roll them out, but do not stack them up. Put 2 pita rounds at a time on the hot pizza stone and bake for 3 to 4 minutes, or until the bread puffs up like a balloon and is pale golden. Watch closely; they bake fast. Remove the bread from the oven and place on a rack to cool for 5 minutes; they will naturally deflate, leaving a pocket in the center. Wrap the pitas in a large kitchen towel to keep them soft.

Quick tip of the day...

Kristen's Food April 2008 013

Just a quick tip for you today. My kids love rice crispy treats as most kids do so when I need to bring treats to a function for kids I love to bring those sweet sticky treats. I like them to look a little fancier though so I make a double batch of them and spread them on a cookie sheet. I let them cool slightly then cut them out with a big cookie cutter. I then stick a big tongue depressor stick in them and cover them in sprinkles. Let them cool slightly and them place in a clear glassine bag and tie with ribbon. The kids love them and they look good too!

Friday, April 11, 2008

Ooey, gooey, caramel and chocolate

Kristen's Food April 2008 015

Sorry that I have been gone for a while, my main computer crashed and it is the one that has my food pictures on it. But here I am with some more goodies for you.

This week while lying in bed, I began to think of ice cream sundaes and yummy, ooey, gooey caramel sauce. So what do I do, I flip through my recipes and find one that I haven't tried before. This caramel sauce comes from one of my favorite chefs, Ina Garten. Her recipe is so easy and basically foolproof and makes the most perfect ice cream topping. It is so easy and quick that it doesn't even make sense to buy it, this is so much better.

Ina Garten's Caramel Sauce

Kristen's Food April 2008 036

1 1/2 cups sugar

1/3 cup water

1 1/4 cup heavy cream

1/2 tsp. vanilla

Mix the sugar and the water in a medium heavy-bottomed saucepan. Cook without stirring, over low heat for 5-10 minutes, until the sugar dissolves. Increase the heat to medium and boil uncovered until the sugar turns a warm chestnut brown (about 350 degrees on a candy thermometer), about 5-7 minutes, gently swirling the pan to stir mixture. Watch the mixture constantly at the end as it will go from caramel to burnt very quickly. Turn off the heat. Slowly add the cream and vanilla. The cream will bubble up and the caramel will solidify: don't worry. Simmer over low heat, stirring constantly until the caramel dissolves and the sauce is smooth, about 2 minutes. Allow to cool at room temperature for about 4 hours. it will thicken as it sits.

I also made a delicious homemade chocolate sauce that was just as good as the caramel. I looked through several recipes for homemade chocolate sauce but I was unhappy with many of the recipes as they contained corn syrup and other things that I just don't want in my food. So, I decided that my favorite chocolate sauce is ganache. I knew if I just thinned it out with by adding more cream than usual that it would be a perfect chocolate sauce. This is easier than the caramel and it is delicious!

Chocolate Sauce

Kristen's Food April 2008 028

1 1/4 cup heavy cream

8 oz of bittersweet of semi-sweet chocolate, chopped

1/2 tsp. vanilla

Place the chocolate in a large bowl. Bring the cream to a boil and pour over the chocolate, add the vanilla. Let sit without stirring for 5 minutes. Stir until smooth. The sauce will be thin, but will thicken as it sits. you can cool it quicker in the fridge. If the sauce gets to thick you can heat it up or add more cream.

del.icio.us Tags: ,

Saturday, April 5, 2008

Le Macaron


I know that I have been absent for a little while and I apologize. I have been baking up a storm and let me say, I am a woman possessed. Let me start at the beginning. The internet is a wonderful thing but it can also be dangerous as in my case! I happened to come across a picture of Pierre Herme's famous macarons. For those who are unfamiliar, Pierre Herme is a famous french pastry chef who makes the most beautiful macarons. Now don't get confused when I say macaron, I am not talking about the american "macaroon" made of coconut. I am talking about the french macaron that is made from egg whites, almond flour, powdered sugar and filled with pastry cream, ganach or buttercream. Once I saw them I knew that I needed to make them since it was a sure bet that I'd never make my way to one of his shops in Paris.

Then, I came across a post by the amazing Helen of Tartlette. She makes the most beautiful macarons among other things and for the first time, I found a recipe that wasn't in french. It was metric, but I thought that as long as I converted it it wouldn't be a problem. Here is where I was wrong, and nothing makes me more compulsive then not being able to do something. Now, after many attempts, here is what I have learned about the finicky macaron. It is not about the recipe, it's about the technique. Anyone can make a batch of cookies if they just follow the recipe, but the macaron is different. I like to think of it more like bread. You may have a recipe for bread, but unless you know how the dough should feel, it's pretty hard to make a great loaf of bread. But I must say, I think that the macaron is a little more picky, if you don't mix it enough, the macarons will be tough and dry, if you mix it too much, they will be flat as a pancake. So, how can you tell when you've mixed it just the right amount? This is where my obsession has taken me this week, trial and error until at last, I came up with something that resembles a macaron. I am not happy with the color and wish my almonds were ground finer, but all in all I am pretty pleased with myself. I am not done though, now that I've got the basics down, it's on to the flavor. If only I could read french so I could follow Pierre Herme's recipes!

Here is the basic recipe I used from Helen's site. Like I mentioned before, it is metric and that is how I made it, by weighing all of my ingredients because as Helen said, it is more acurate. I tried several times with conversions but was unable every time to produce a worthy macaron. So, if you'd like to make these, I advise you to use a scale and weigh the ingredients. Oh, and don't skip using the day old egg whites, I know it sounds gross, but it never worked for me with fresh egg whites.

Macarons

3 egg whites (I like to use 2-3 day old egg whites)
50 gr. granulated sugar
200 gr. powdered sugar
110 gr. ground almonds
2 Tb blue powdered food coloring

For the whites: the day before (24hrs), separate your eggs and store the whites at room temperature on a covered container. If you want to use 48hrs (or more) egg whites, you can store them in the fridge.
In a stand mixer fitted with the whisk attachment, whip the egg whites to a foam, gradually add the sugar until you obtain a glossy meringue. Do not overbeat your meringue or it will be too dry and your macarons won't work. Combine the ground almonds and powdered sugar in a food processor and give them a quick pulse. It will break the powdered sugar lumps and combine your almonds with it evenly. Add them to the meringue, give it a quick fold and remove some of the batter that will remain uncolored. Add 2 TB food coloring to the rest and fold the mass carefully until you obtain a batter that flows like magma or a thick ribbon.
Give quick strokes at first to break the mass and slow down. The whole process should not take more than 50 strokes. Test a small amount on a plate: if the tops flattens on its own you are good to go. If there is a small beak, give the batter a couple of turns. Do the same for the plain batter.s
Fill a pastry bag fitted with a plain tip with the batter and pipe small rounds (1.5 inches in diameter) onto parchment paper baking sheets. With a toothpick dab dots of the plain batter rand swirl. Preheat the oven to 300F. Let the macarons sit out for an hour to harden their shells a bit and bake for 8-10 minutes, depending on their size. Let cool.
If you have trouble removing the shells, pour a couple of drops of water under the parchment paper while the sheet is still a bit warm and the macarons will lift up more easily do to the moisture. Don't let them sit there in it too long or they will become soggy. Pipe or spoon some ganache on one shell and sandwich with another one.
If you use fresh whites, zap them up in the microwave on medium high for 20 seconds.

Ganache filling

1/2 cup heavy cream
3/4 cup bittersweet chocolate

Heat the cream in a saucepan until boiling. Pour the cream over the chocolate and let it sit for 5 minutes. Stir until smooth. Let sit to thicken until it is spreadable or you are able to pipe it from a piping bag.